How to gain more traction on a limited budget
Story and pictures by Keith Auble
I Wish I had an Aussie Locker here. |
How many times have you been in a situation where you just wished you had a little more traction? How easy would it have been to get through that spot that no one else could? If only you had that little extra bit of traction! Now there is a way to gain that little extra bit, and best of all, it is an affordable way. The product is by Torq-Masters, it is called "Aussie Locker". |
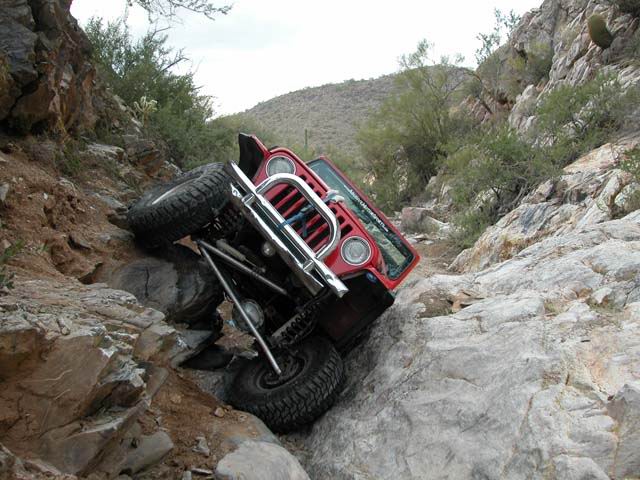
What the Aussie locker does is, provide constant power to both tires. No matter where you are, or what your doing. What does this mean? Both your tires are still spinning, whether you are up to the frame in mud, or on two wheels in the rocks. The Aussie locker is always on and there when you need it. I purchased an aussie locker, I am so happy with how well it works and how easy it was to install. Please follow along as I install my Aussie locker into my Ford 8.8 differential. |
Ford 8.8 disassemblyAt the start of any job you want to ask yourself if you have everything you need. I am going to make this easy by telling you everything to get ahead of time. First and most important is make sure you have gear lube to refill your differential. You will also need a drain pan, floor jack, jack stands, lug wrench, and a standard socket set with combination wrenches. Assembly lube is also a nice thing to have. |
"Aussie Locker" The affordable way to guarantee you are never stuck with two tires spinning in the air. |

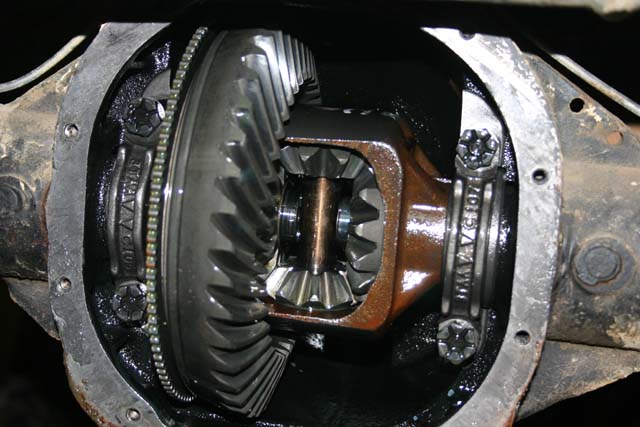
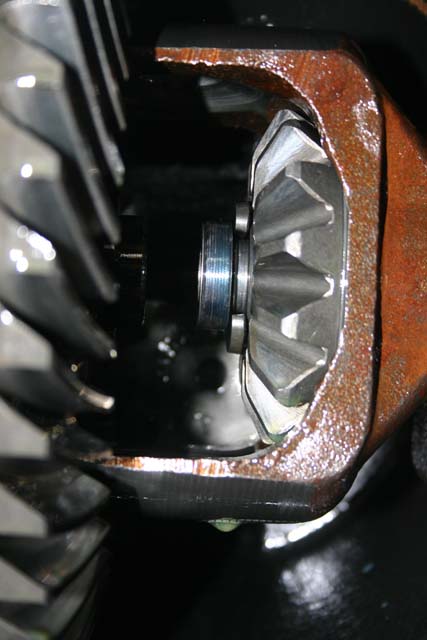
Ford 8.8 with the cover removed. |
The most important part of the install is to be safe! First thing you should do is jack up the jeep and put it on jackstands, then remove the tires and brake drums or disks. Now place the drain pan under the diff. and remove the diff cover bolts. I like to leave the top bolt loose in the diff, this allows me to break the seal without the cover dropping into the drain pan. Allow the diff to drain for a few minutes to minimize the mess. |
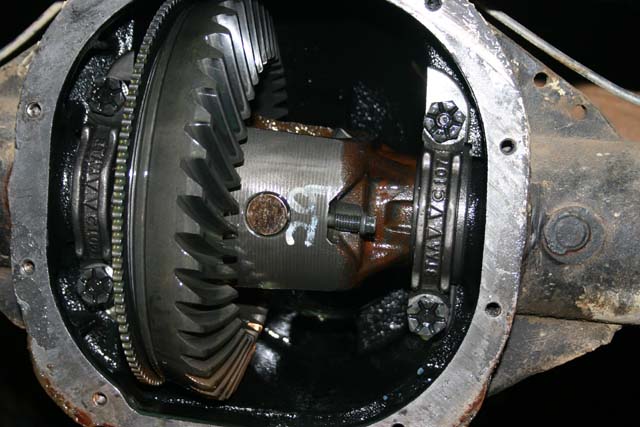
Once the diff has mostly stopped dripping you can begin by removing the retaining bolt that holds the centerpin in place. After the retaining bolt has been removed the centerpin should slide right out. Be sure to inspect both pins for damage, if either one is damaged they should be replaced, you will be reusing these so be sure not to misplace them. |
Removing the retaining bolt holding the centerpin. |
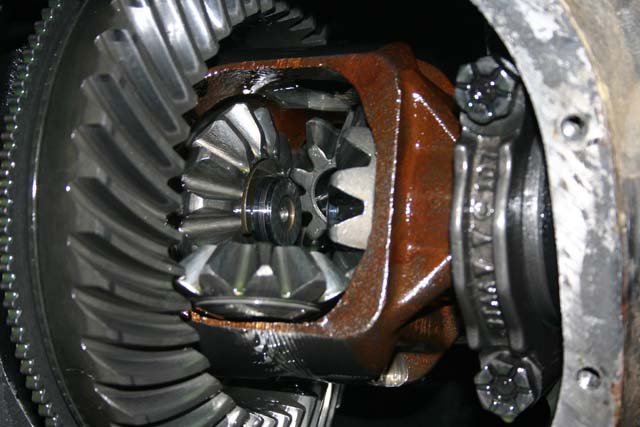
Spider gears rotating out of the carrier |
With the centerpin removed there is nothing holding the spider gears in place. If you slowly start to turn one tire, the spider gears will rotate there way out of the carrier. Be sure to catch these before they hit the catch pan, they will make a rather large splash. |
With the spider gears removed you will be able to see the end of the axle, and the C-clip which is holding the side gear and axle in place. You will be reusing the C-clips, be sure they do not fall into the drain pan. To remove the C-clip rotate it so that the open part is pointing straight up. Once this is done all you have to do is push the axle in a little bit. The clip should drop right into the carrier. If it does not drop you should be able to grab it with your fingers and it will come right out. Repeat the same procedure for the other side. At this point you will need to pull the axles back just far enough to get the side gears off. Be sure to remove the side gear shims with the side gears. Be sure to save these for the locker install. Since you are in this far, I would remove the axles completely, and check all the seals and splines for any damage. If there is any now is the best time to replace them. |
From left to right Axle end, C-clip, Side gear. |
carrier with spider and side gears removed. |
Now that everything is removed from the carrier, it is time to begin the locker install. Be sure there is no dirt or debris inside the carrier before you begin. |
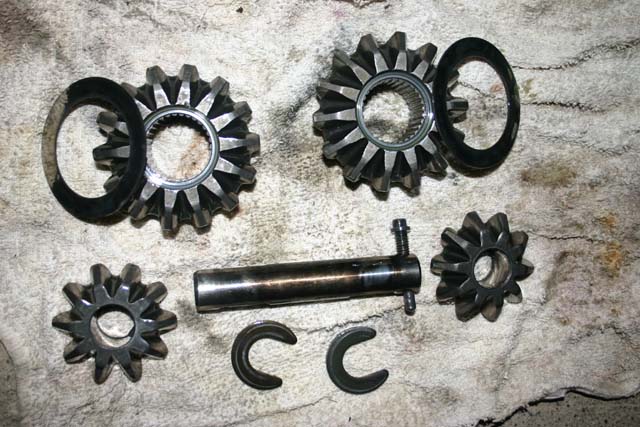
Top left to right side gear shim, side gear (2 each), Bottom left to right spider gears (2 each), centerpin with retaining bolt, and C-clips (2 each) |

"Aussie Locker" is a registered trade mark
of Torq-Masters Technology, Inc.